The Ultimate Guide to Installing Weed Barrier Fabric: Your Garden's Secret Weapon
Weed control is one of the most persistent challenges gardeners and landscapers face, yet the solution has been hiding in plain sight for years. Weed barrier fabric is not just another gardening gimmick-it's a proven, science-backed method to reclaim your outdoor space from unwanted plants. Here's everything you need to know to install it like a pro.
I. What Makes Weeds So Persistent?
Before we tackle installation, let's understand what we're fighting. Weeds are nature's ultimate competitors, thriving in sunlight and soil where your desired plants struggle. Traditional weeding is labor-intensive, herbicides come with environmental concerns, and hand-pulling never seems to fully eliminate the problem. This is where weed barrier fabric enters the game as a game-changer.
The science is straightforward: weed barrier fabric works through a three-pronged attack mechanism. First, it blocks sunlight from reaching weed seeds, preventing photosynthesis and germination. Second, it acts as a physical barrier that literally suffocates emerging weeds, cutting off their access to light and nutrients. Third, high-quality commercial-grade fabrics maintain superior breathability, allowing water and air to pass through while keeping weeds trapped below.

II. Advantages and Disadvantages: The Complete Picture
Understanding both benefits and limitations helps you make informed decisions about weed barrier fabric installation.
Significant Advantages
Dramatic reduction in weed growth-often by 80-90% when properly installed.
Less time spent on manual weeding, allowing you to focus on cultivating plants rather than fighting nature.
The fabric suppresses perennial weeds effectively, prevents soil compaction in pathways, and reduces reliance on chemical herbicides, making it an environmentally conscious choice.
Helps maintain consistent soil moisture and moderate root zone temperatures, promoting healthier plant growth.
Long-term cost savings; a single installation protects your beds for 5-10 years, ultimately costing far less than repeated weeding efforts or herbicide applications.
Important Limitations
Requires proper installation-poor placement allows weeds to flourish underneath.
UV degradation is a real concern; uncovered fabric deteriorates faster than protected fabric, typically lasting 3-5 years versus 7-10 years when covered with mulch.
Can impede nutrient cycling and organic matter decomposition if installed directly over native soil.
Accumulated mulch can create its own seed bed, and weed seeds may blow in on top of the protective layer.
Difficulties in planting new plants or relocating existing ones once fabric is secured.
In heavy rainfall areas, non-breathable fabrics can trap moisture and promote root rot.
Initial installation requires significant labor investment and upfront costs, though these are recovered through reduced maintenance over time.
III. Choosing the Right Fabric: Not All Barriers Are Created Equal
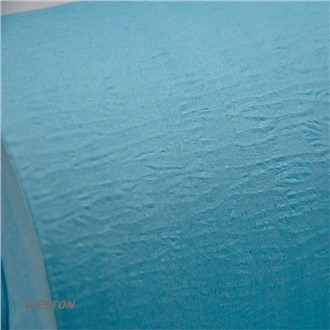
Your first decision should be which type of fabric suits your project. Woven landscape fabric, made from interlaced polypropylene strands, offers exceptional durability and tensile strength-making it ideal for high-traffic areas, driveways, and heavy gravel installations. For permanent garden beds and agricultural applications, woven fabric is your best bet because it resists UV degradation and maintains its integrity for years.
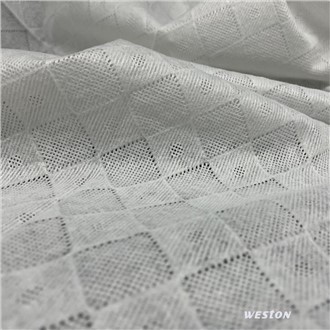
Non-woven (spunbond) fabrics bond fibers together through thermal and mechanical processes rather than weaving them. These excel at water penetration and work wonderfully on slopes or where superior drainage matters. Advanced non-woven technologies like Spunlace Nonwoven fabric offer exceptional balance between strength and permeability, making them increasingly popular for diverse landscaping applications.
IV. Preparation: Where Success Actually Begins
Installation begins long before you unroll any fabric. Thorough preparation separates successful projects from frustrating failures.
Start by completely clearing your area of existing weeds. Don't compromise here-pull them by hand, hoe them down to the roots, or use a systemic herbicide if dealing with particularly stubborn perennial weeds. Wait at least two weeks if you've used herbicides before proceeding.
Next, comb your soil bed with a bow rake to remove dead leaves, twigs, and debris. This seemingly small step is crucial: any sharp rocks or sticks underneath the fabric can puncture it, creating weed highways. Level the ground thoroughly-your fabric should lie flat and snug against the soil with no air pockets.
V. Installation: The Critical Steps That Make the Difference
Measure your area and cut fabric with a few extra inches along all edges. Roll out your landscape fabric smoothly across the entire prepared area. If using multiple sheets-overlap each section by at least 6 to 12 inches, with 10 centimeters being the minimum standard. Insufficient overlap creates seams where weeds exploit gaps and poke through.
Secure everything properly with landscape staples or pegs. Professional installation uses staples every 8 to 12 inches along all edges and seams. This might seem excessive until you watch the wind lift unsecured fabric or discover weeds creeping around loose edges.
For planting, cut an X-shaped incision wherever you want plants. Make the cut just large enough for the root ball, then pull back the fabric triangles to dig. After planting and backfilling soil, secure the fabric flaps snugly around your plant base-leave no room for determined weed roots.

VI. Coverage and Material Selection: The Professional Touch
Your installation isn't complete without a protective top layer. Cover the fabric with at least 3 to 5 inches of mulch, woodchips, or gravel. This does more than improve appearance-it shields fabric from UV damage, anchors the barrier, and provides additional weed suppression. However, avoid excessively heavy materials that compress the fabric and compromise its breathability.
Even with perfect installation, weed seeds will blow in on top of your mulch and germinate there. Pull these seedlings before their roots penetrate through the fabric. This maintenance is exponentially easier than managing an entire weed-infested bed.
VII. Why Quality Materials Make the Difference
Selecting a PP Nonwoven Weed Barrier Fabric from reputable manufacturers ensures you're getting genuinely effective protection. Quality non-woven materials balance UV resistance, water permeability, and durability-critical factors that determine how long your investment protects your garden beds. Leading manufacturers produce commercial-grade fabrics specifically engineered for long-term landscape protection, with options designed for various climate conditions and installation scenarios.
The difference between budget fabrics and quality commercial-grade materials becomes obvious within the first growing season. Professional-grade fabrics maintain structural integrity, resist tearing, and provide superior weed suppression for extended periods.
VIII. The Real-World Impact: Transforming Your Garden
Installing weed barrier fabric correctly transforms garden maintenance from an endless battle into manageable occasional weeding. You'll spend less time pulling weeds, reduce reliance on chemical herbicides, and create stable, clean growing conditions for years. The upfront investment in quality fabric and proper installation translates directly into long-term savings and garden sanity.
For those seeking premium materials or sample products to evaluate, leading manufacturers provide accessible resources. Simply reach out at info@westonmanufacturing.com to explore options that match your specific project requirements.
The barrier you install today becomes your garden's hardest-working defender tomorrow, delivering years of reliable weed suppression and reducing the physical toll of constant garden maintenance.